cake

Flourless Chocolate Cake

Yup. It might not get any better than this. Talk about chocolate heaven. 

If there is ever an ideal ‘dinner party’ cake its this one. So delicate, light and decadent. Rich, gooey and completely chocolatey. Having said this, I’m not having a dinner party. This is just a mid-week chocolate madness.

A very selfish cake, I already think I should hide it. It’s mine! You will know what I mean when you try it.. It can’t just be me, sorry, I refuse. Hiding it is TOTALLY justifiable. It is. 

20140305-140057.jpg

Ingredients:

200g Dark Chocolate

100g Butter

4 Large Eggs

185g Icing Sugar

Method:

Preheat oven to Gas Mark 4/108C/350F. Place a saucepan around 1/3 filled with water on the hob to reach a simmer.

Break the chocolate in to a bowl (you will use this over the saucepan so make sure its the correct size) and add the butter. Put the bowl over the simmering saucepan, making sure that the water does not touch the bottom of the bowl. Leave this on a low simmer to make sure the chocolate melts gently. As soon as you have completely melted the butter and chocolate remove the bowl from the heat. 

Separate the eggs. Staring with the yolks, whisk along with the icing sugar until pale and creamy. Around 1 1/2 minutes in an electric mixer will bring you to this stage. Moving on to the whites, these should be whisked together in a separate bowl until soft peaks form – make sure the bowl and whisk are clean and dry. 

Fold the chocolate mixture in to the yolk mix until fully incorporated. When this has come together and your egg whites have reached soft peak stage you can now gently fold in the whites to the rest of the mix. Make sure this is completely combined.

Carefully pour the mixture in a lined cake tin and transfer to the oven for 30-40 minutes. The cake will be ready when it appears to have a cracked top but is still gooey in the middle. There should be no wobble.

Remove and allow to cool in the tin. Dust with icing sugar and transfer to a plate.

I recommend serving with fresh double cream or ice cream and some fresh berries.  

Unblogged creations..

I haven’t stopped baking. Oh no, baking runs in my veins. So while I’ve been away what have I baked? A lot! I will tell you that. I just thought I would share pictures below, as proof!

I baked 20+ giant cookies for the school cake sale. Made THE best carrot cake ever. A must! Helped my daughter make Sable Rudolf’s and jam filled stars. Slaved over 36 ice cream inspired cupcakes for daughters friends to celebrate her birthday. Dabbled for the first time with sugar paste. I envy you if you can use this stuff. I must say I was pleased for a first attempt but I definitely need practice. I even whipped up a baked cheese cake. I don’t like cheese cake I might add! Many more things happened but these are all the pictures I have to hand.

20140213-105540.jpg 20140213-105617.jpg 20140213-105641.jpg 20140213-105726.jpg 20140213-105737.jpg 20140213-105750.jpg 20140213-105800.jpg 20140213-105811.jpg

Rose & Vanilla Triple Layer Cake

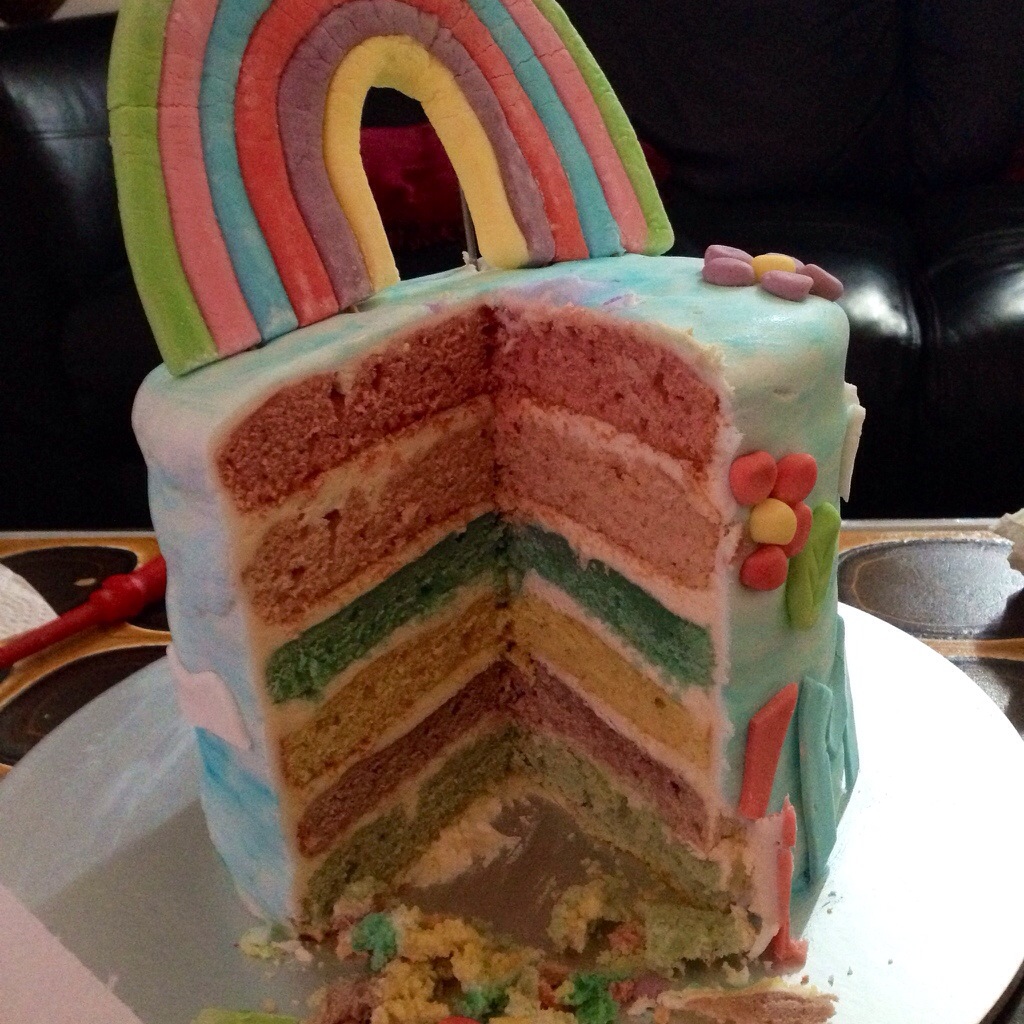
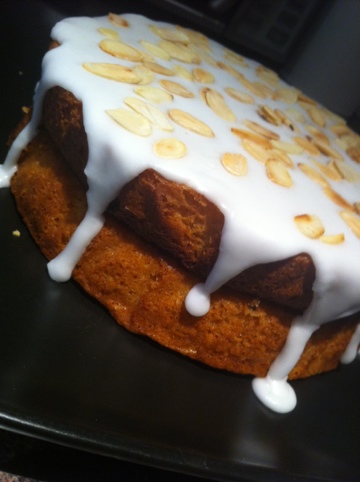
If you have an occasion coming up this is a amazing cake to turn up with. Today Im spending all day in the kitchen to produce a knock out cake for my daughters 3rd birthday tomorrow. I was going to do a tortoise cupcake cake, no need to slice just pull an individual cupcake from the design, ingenius. She decided against that idea but instead opted for a pink cake, typical! Although I think to myself how boring, I came up with a cake that will taste sensual and will look fun. I decided on a 3 layer cake first off! Secondly I thought about flavours, rose popped into my head straight away, I’d been waiting to use it since new year, this was my chance. Finally! So Rose, got that, but what else? How about a different flavour, I instantly thought of a vanilla layer centered in the middle of the 3 layers. Beautiful. So 3 layers consisting of rose flavoured ‘pink’ sponge on top and bottom, with a layer of vanilla sponge in the middle, but what about icing? Vanilla icing? Rose Icing? Possibly even Raspberry? I opted for a pink tinted vanilla buttercream, decoration hit me straight away. Flumps, the barratts marshmallow twists (unsure of their availability in the US or worldwide but they are definitely still avialable in the UK) they are the perfect colour to dress my cake. Topped with pink and white pearls. We should of had glitter too but it was unavailable in my supermarket much to my disappointment.

Im excited for this cake, I am sure its going to look and taste amazing. Votes in tomorrow. If you have an upcoming occasion why not come back and try this recipe. Its adapted by myself from various flavoured sponge cakes across the web, as with most of my recipes unless stated. Would make the perfect alternative wedding cake with its delicate rose flavouring and scent (I hope).

Rose & Vanilla Triple Layer Cake

20120201-005242.jpg

You will need;

Basis-
400g of unsalted butter.
400g of caster sugar (Once again I use half brown half white)
400g self rasising flour.
8 medium eggs.
2tsp of baking powder.

Vanilla sponge-
1.5tsp of high quality vanilla extract.
2tbsp of milk.

Rose sponge-
3-4tsp of rose syrup (available in the world food section of large supermarkets)
0.5-1tsp of red food colouring (depending on the depth of colour you wish to achieve)
1tbsp of milk.

Vanilla buttercream-
650g icing sugar
200g butter
.05tsp red food colouring
1tsp vanilla extract
3tbsp milk

Tools-
17inch cake tin with loose bottom.
Wooden spoon.
2 large bowls.
Measuring spoon.
Weighing scales.
Electric mixer.
Baking Paper.

To start, preheat oven to gas mark 4/180 celcius. Cream butter (at room temperature) and sugar together until fluffy, then your going to add 2 eggs with 100g of flour each time until incorporated into the mixture, with the last 100g of flour add the baking powder and blitz. At this point I removed 1/3 of the mixture into a separate bowl. Into the 1/3 of the mixture I added the ‘vanilla ingriedients’ as listed under vanilla sponge until incorporated. Now go back to the bowl containing the 2/3 mixture and add the ‘rose ingriedients’ as above until incorporated fully. I’m using one cake tin for this, so I’m cooking in 3 seperate batches but you dont need to do this if you have 3 of the same tin. Wet the inside of the tin slightly to help the baking paper stick neater, you want it sitting as flat to the sides and bottom as possible. Fill each with 1/3 of the mixtures and bake for 25-30 minutes (rose cake will need up to 50 minutes) until a cake tester comes out clean or when touched the sponge springs back. While the cake is baking get started on your buttercream (feel free to use the provided recipe, or your go to buttercream) all you need to do for this is mix butter and icing sugar and your chosen flavour until you form a thick paste suitable for spreading. Your going to need a lot to cover the whole cake outside and between each layer so be prepared. After each cake comes out leave to cool on a wire rack until completely cooled then remove the baking paper and place on the surface you will be using to carry the cake. It will be quite hard to move from one surface to another after iced and decorated. I want to achieve the flattest ‘stack’ with the cakes so I start with one rose top down, then vanilla top down, finally the other rose top down. With a layer of your buttercream between each. Each layer of buttercream should just overflow a little, you then need to start to cover the whole cake (there are good tutorials for this on youtube if you havent done this before), when finished decorate with whatever you wish, its entirely upto you at this stage.

20120201-205655.jpg

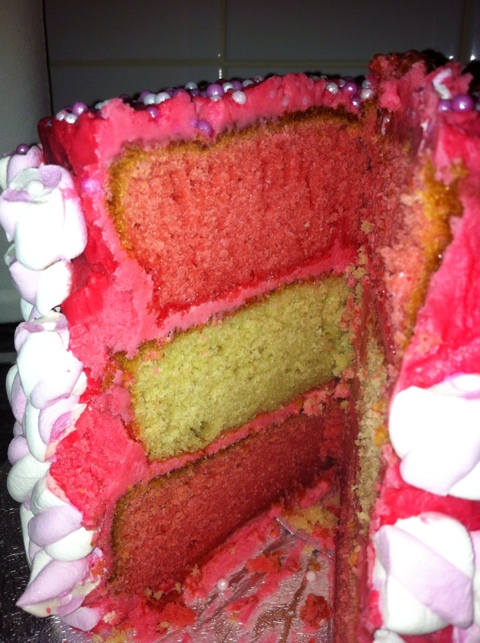
Update: Cake was amazing, cut beautifully and the rose was lovely and delicate. Winner all round, definitely worth a try. Just disappointed I didn’t decorate it different now, oh well, next time.

Black Cherry Bakewell Cake

Me again. Baking alot? I think so. I’m been waiting with excitement for this bake to land on my sideboard. Literally cannot contain myself. Bakewell tarts are amongst my favourite, EVER! So here we have a twist on the tart, it’s a cake!! The idea comes from the BBC good food site, once I saw it in all it’s glory it got added to my baking queue (yes, I have a one!)

Black Cherry Bakewell Cake

20120125-163533.jpg

A gorgeous almond cake, filled with black cherry conserve, topped with a thick smooth icing and toasted almonds. Could you ask for anything more? I couldn’t! I love almond, they bring childhood memories right back, even just the taste. Come on, try it, you know you want to.

You will need;

Electric mixer.
Sturdy mixing bowl.
2 – 20cm round cake tins.
Baking paper.
200g of softened butter.
200g of golden caster sugar, I use half white half brown.
4 eggs.
100g ground almond.
100g self raising flour.
1tsp baking powder.
1tsp of natural almond extract.
For the icing;
100g of icing sugar.
6-8 tbsp of water.
Half a jar of black cherry conserve (for the filling).

Preheat oven to gas mark 4/180 degrees. Cream your butter and sugar until light. Add 2 of your eggs with half of your flour and beat until incorporated, then repeat with remaining flour and eggs. Mix in your ground almonds, extract and baking powder followed by a pinch of salt. Line your baking tins and spoon mixture evenly between each tin. Put in middle of oven for 25-30 minutes, until a skewer comes out clean. Leave to cool in tins for 10 minutes before transferring to a wire rack. While waiting for the cake to cool mixing you icing sugar and water until you form a thick paste, but that will run slightly. When cakes are completely cool, put one cake top side down and spread with a generous amount of jam (I use half a jar) and position next cake on top, do this whichever side is going to give you a nice level top. Spread the icing to the sides of the cake and allow to drip down the sides as it wants to before sprinkling with toasted almonds. Your done! Voila!

Enjoy mid afternoon with a cup of strong tea. Just a suggestion. This would make the perfect occasion cake to enjoy with family, or by yourself. It’s just that nice. Enjoy and check back soon for more bakes. Thanks for looking. Please follow, and tell your friends.